Today's post is sponsored by Expressions Vinyl and contains affiliate links. Thanks for supporting Pitter & Glink!
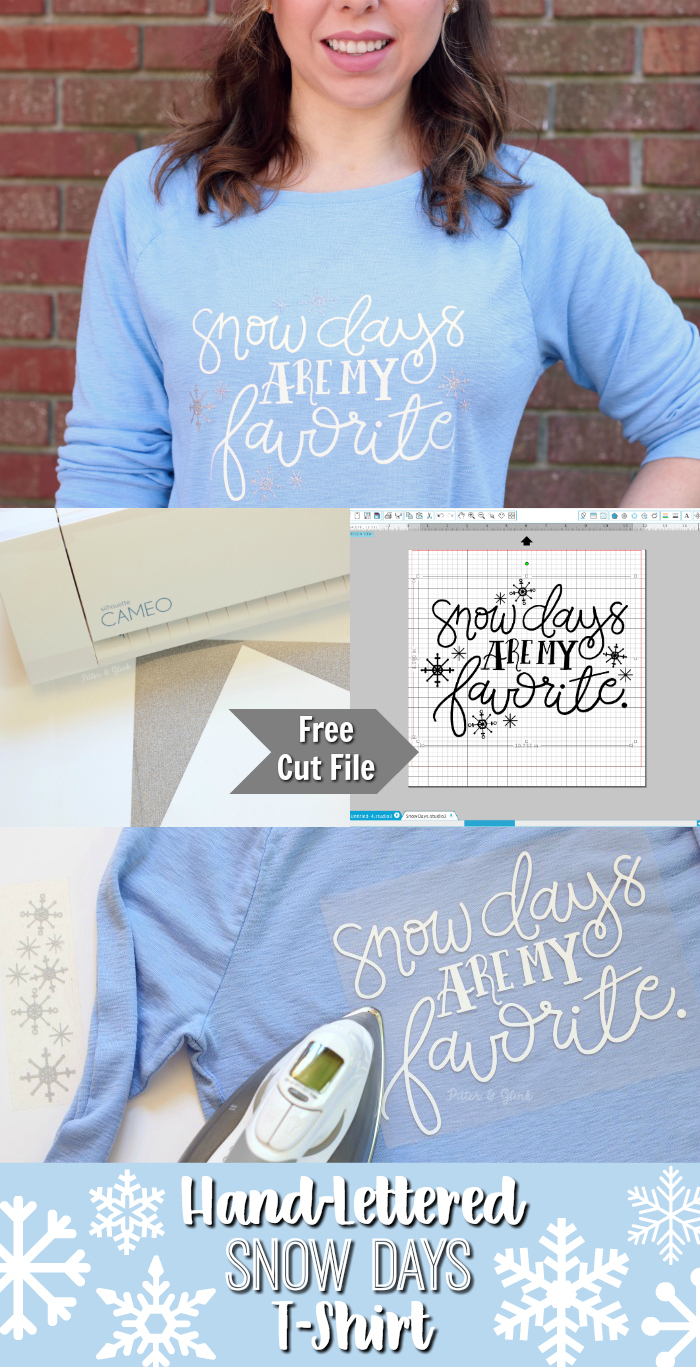
Hey, y'all! It's almost Christmas!!! I seriously cannot believe that the Christmas holiday is upon us. I would say that I've been dreaming of a white Christmas, but I live in South Carolina, and normally I can't even wear a sweater on Christmas without, well, sweating. But when we do get a snow day in January or February, it is GLORIOUS! With that thought in mind, I created a brand new hand-lettered design that I put on a tee. Today I've teamed up with Expressions Vinyl to bring you the tutorial, and, of course, I'm sharing the FREE cut file with you so that you can make your own.

As a teacher, there's nothing like waking up to a pre-recorded message that school has been cancelled due to SNOW! And, yes, it is true that everything shuts down in the South if we get even an inch of snow, so it's so fun to snuggle beside a fire inside and watch those lovely white flakes fall outside and make everything beautiful. As you can tell, snow days are my favorite, so I thought it would be fun to have a t-shirt to celebrate that. If you're like me and love snow days, you can make yourself a tee in no time following the tutorial below. Let's get started!
First of all, you'll need a few supplies to get started. I'm going to link to them below using affiliate links. This is just a fancy way of saying that if you decide to purchase something via one of my links, a small amount of the purchase price will go toward helping support my blog at no extra charge to you. (Thanks!)
Supplies:
First, you'll need to download the FREE hand-lettered Snow Days cut file that I created.
When you click on the link above, the webpage will say "no preview available," but you can still download the file by clicking on the blue box below that.
***Please note that all cut files shared on my website are for personal use only. You may not redistribute them, claim them as your own, or use them on products you sell.***
Once you download the file, open it in Silhouette Studio. (Or in your Cricut program.)
As with all projects using HTV, you should use the replicate tool to mirror your design. Once the design is mirrored, you can simply cut it if you plan to use the same color HTV for the entire design, or you can ungroup the design and cut the different color elements individually.  I removed the snowflakes from the design and cut the phrase from white EasyWeed HTV following the machine settings guidelines on the Expressions Vinyl website. Then I cut the snowflakes from the glitter HTV. Note: There's a box around my design--called a weeding box--because I like to be able to easily weed my design without wasting vinyl.
Once the design is cut, use a
weeding tool to remove the excess HTV from around the design.
Next, it's time to iron the design onto your tee. I love to refer to the
HTV setting chart on the Expressions Vinyl website to make sure I iron the design the right amount of time. Because I used two different types of HTV, I ironed the white design first and removed the clear protective covering before arranging my snowflakes and ironing them down.
Once all the elements of the design were ironed, my t-shirt was finished!
I just love the way the snowflakes sparkle!
Now I just have to wait for some snow...I'm not going to hold my breath though.
As always, if you make your own version of this tee or use the cut file to create art or personalize a mug or anything at all, please share your creation with me. I love seeing what people do with my designs! And in case I don't post again before the 25th, merry Christmas!
 Related Posts:
Elf-Inspired Hand-Lettered Tee + Free Cut File


Wow...your work is really amazing!
ReplyDeleteThanks for sharing.
Maria from Chriply.com
This comment has been removed by a blog administrator.
ReplyDeletethank you for this file. Snow days.. it's perfect for us Michiganders.
ReplyDelete